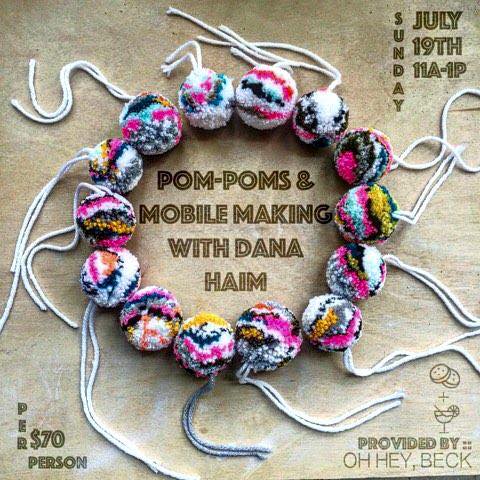
And just like that it’s been several weeks since I’ve posted anything! I’m now back to work and busier than ever (but still making sure I carve out PLENTY of time for my little one!). I’m also making time for extracurriculars…like baking for this Sunday’s pom pom + mobile making workshop led by Dana Haim over at Wynwood Letterpress. Here’s a peek at the poms and one of the sweet treats I’ll be making {I’ll also be making an iteration of this}. Want to attend? Register HERE. {And hurry! Space is limited.} 

baking
{Easter} Desserts
Easter is just a few weeks away and because I’ll probably be having our baby around that time {I’m due April 6!} I thought I’d share some fun dessert ideas a bit early.


Here are a few I’ve made.
Fore more cute ideas, check out my Easter Dessert Pinterest Board.
Bake-a-Bowl
Last weekend while the Mr., Penelope and I were out, we came across the Bake-a-Bowl pan at Crate & Barrel, and I immediately fell in love…and because he knows how much I like baking, and it was Valentine’s Day, and all the versatile things {both savory and sweet} that you can make with it, the Mr. got it for me.
We didn’t waste any time and had brownie bowl ice cream sundaes that very night! There are several ideas on the packaging and on their website, and it’s so easy to use. Just pour whatever batter you’re using to the “fill up to here” line, place the other pan on top and bake…totally goof proof! I’m actually hoping to get another one, so I can make at least a dozen bowls at a time, especially to have friends over.
The Mr. & I have been brainstorming ideas, so I’ll be sure to update the blog with any fun, new creations we come up with! {And I’ll actually take more pictures next time. We were hungry and didn’t have time the first go-around.}
Next on the bowl menu? Corn bread chili bowls.


In the meantime…do you have any ideas we can try?
My Weekend {In a Nutshell}
My weekend consisted of lots of balloons (they were actually for my baby bump photo shoot but worked well with Valentine’s Day too), lots of dessert, and lots of time with my loves. It was pretty great! Here’s a peek…

A nail polish color I created by layering Revlon’s Nail Enamel in ‘Coy‘ over a coat of their Colorstay Gel Envy in ‘All or Nothing.’ It provided just the shade of pink I’d been looking for.
Dried flowers from the baby shower + a fresh pink bouquet of hydrangeas (also from the photo shoot).
The supplies for the white chocolate covered pretzels I made for the Mr + my sister.
The scene at the store on Friday when I went to pick up some balloons for the shoot.
Our balloons.

Being married to a Cuban, I figured there was no better way to start Saturday than with guava + cheese heart-shaped croissants.

My view heading in to my first prenatal yoga class.

An adorable bunny we picked up for the baby’s room while out on Saturday.

Brownie bowl ice cream sundaes I made for dessert.

The al fresco dinner the Mr. set up for our Valentine’s Day dinner. On the menu? P.F. Chang’s leftovers.
I hope your weekend was great too! Be sure to come back during the week for fresh posts (hint: dessert will be involved).
{Valentine’s Day} Desserts
Valentine’s Day is less than two weeks away, and while we’re not particularly big on it at our house, I do jump at the opportunity to bake + decorate for it. Here are a few fun ideas + a quick last-minute snack I made last year.


For these and other fun ideas, check out my Valetine’s Day Dessert Pinterest board.

Do you have a favorite Valentine’s Day-inspired dessert?
seeing spots
I love prints, so it’s no surprise they made their way into my baking. Inspired by Pinterest, I decided to give baking a polka dot cake a try. Easy to make and incredibly fun to eat, they are my new favorite! Here’s a quick guide to making your own:


1 – prepare batter as usual.
2 – divide small amounts of batter into separate bowls, depending on how many cake pops you want to make (I used a 9×9 pan and 9 cake pops provided polka dots in just about every slice).
3 – add food coloring to the small bowls of batter.
4 – poor batter into cake pop pan. (hint: instructions that came with cake pop pan recommended adding flour in addition to non-stick spray or butter to ensure cake pops don’t stick. I didn’t have flour, so I only used the spray and didn’t have a problem.)
5 – once the cake pops are baked and have cooled, pour most of the batter into your pan and add cake pops.
6 – cover the cake pops with the remaining batter. (hint: as the cake bakes it rises, pushing the cake pops up out of the batter, so halfway through baking, be sure to open oven and gently push them back down into batter).
7 – once it bakes and cools, decorate as usual.
See, I told you it was easy. I can’t wait to get creative and try other flavors & colors. Be sure to let me know how it goes if you try it! You can also tag me on IG #ohheybeck.
Happy baking!
How Can I Have S’more…?
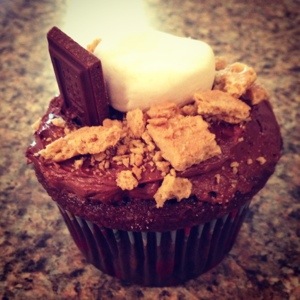
I’m making dinner for our friends tonight and wanted a fun twist on dessert. Though I’m always a fan of chocolate I wanted to kick it up a notch (it is Friday, after all) but was short on time. Inspired by Cheesecake Factory’s new S’mores Cheesecake coming out later this month (and because I had left over s’mores ingredients from the 4th of July) I thought I’d make a s’mores cake! To give my cake + cupcakes a quick facelift, I mixed in chocolate chips and dropped a few of the large marshmallows into the center of the batter once it was in the pan. {Note: the large ones work better as the smalls ones get lost in the cake.} Once I took them out of the oven and let them cool, I crushed several graham crackers, sprinkling them on top. Then I topped them with the large mallows and a square of Hershey’s chocolate…and TADA! With a few easy steps I took my cake from plain ol’ chocolate to S’MORES!
I leave you with this scene from one of my all-time favorite summer flicks. Have a a great weekend!
Becky Crocker: Minnie Mouse Edition
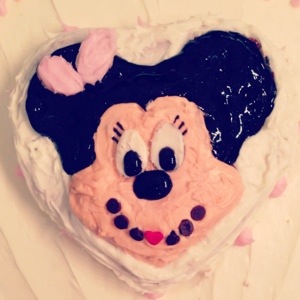
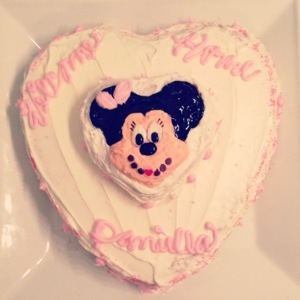
Hello and happy Monday! I hope you had a good weekend. My weekend started off great! My good friend had her second baby girl on Friday, so I decided to bake a cake in the little one’s honor. {What better way to be welcomed into this world than with cake?!}
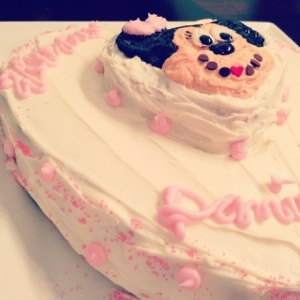
I’d bought the tiny Mickey baking pan {which I layered on top of a larger, heart-shaped cake} in Downtown Disney years ago. With a few painted lashes, red lips and a frosting-covered almond bow, I quickly transformed it into Minnie.
I didn’t have all of the tools I would’ve liked {like a decorating bag with the tips} and some of the products I used were new to me and didn’t quite work out how I’d anticipated, so I felt the Minnie looked a bit sloppy. However, my friend liked the cake and everyone ate it just fine, so I’ll count it as a success!
Here are just a few quick tips I learned making this cake.
1. Gel is a lot more runny than frosting. I used the Wilton Black Sparkle Gel. It has a very pretty shimmer effect to it which I don’t think can be appreciated in these pictures. I do think if I’d had the bag and tips to draw the white around the ears it wouldn’t helped keep the black gel from running.
2. Toothpicks are surprisingly helpful. Particularly when working on a very detailed design, toothpicks can be very helpful. Example: I dipped a toothpick in the black gel and with a few light strokes, painted Minnie’s lashes. They’re also helpful for moving chocolate chips, sprinkles, etc. as they have a much finer tip than your fingers.
3. Look to unexpected ingredients to help create your design. Because I didn’t have the bag and tips, I was having a hard time figuring out how to make the eyes. So I frosted a couple almond slivers and {with the help of toothpicks} set them on the face. I did the same for her bow. I didn’t want to frost directly on the ears since, as I mentioned above, the black is runny.
Hope these tips help! Be sure to follow me on Instagram for fun little baking videos: @ohheybeck
Next on my agenda: a s’mores cake. I can’t wait!
P.S. My friend’s baby girl is ridiculously cute {just like her big sister}!
